

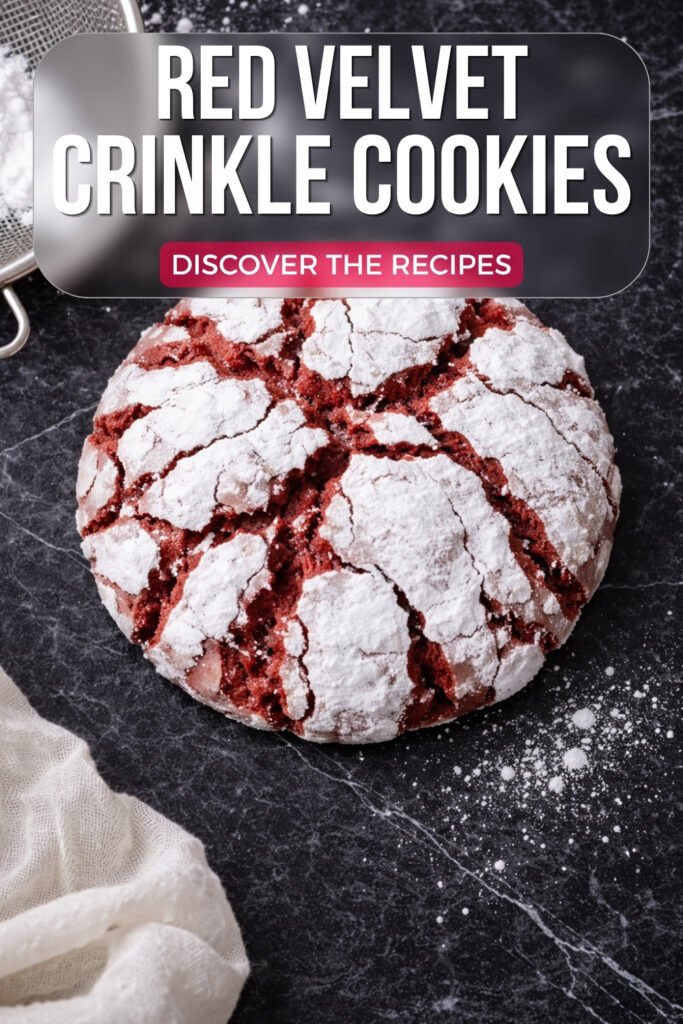
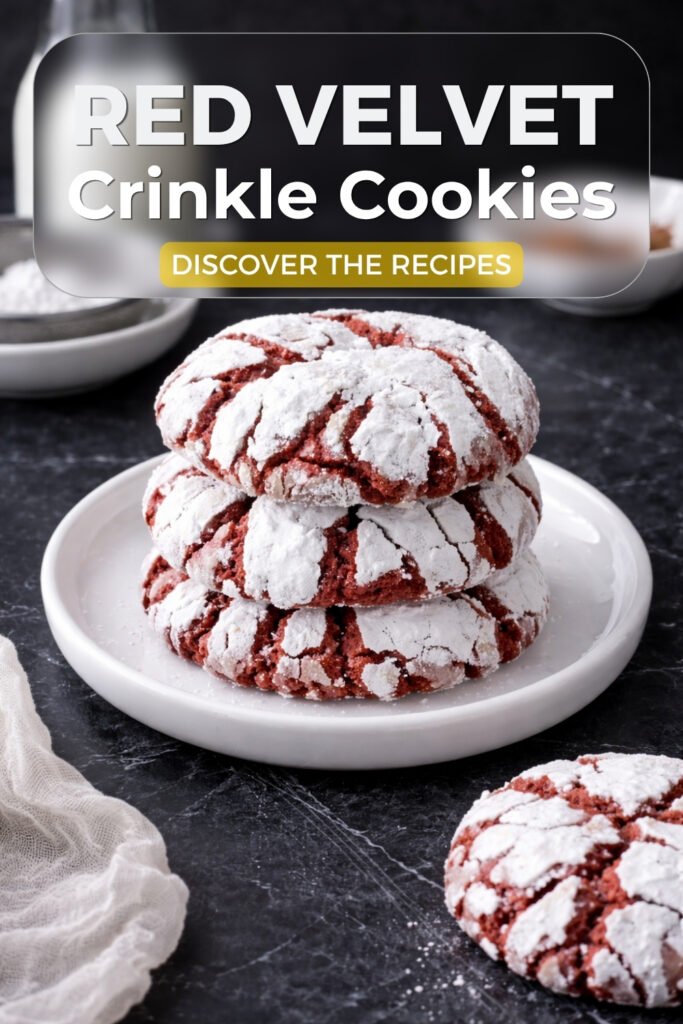
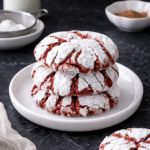
Red Velvet Crinkle Cookies
So there I was, wandering through a Christmas market in Vienna last December — the kind with twinkling lights and the smell of cinnamon everywhere — when I spotted these gorgeous red-and-white crackled cookies stacked in a little bakery window. I stood there like a weirdo pressing my face against the glass, trying to figure out what they were. Red Velvet Crinkle Cookies. I bought four immediately, ate two on a freezing bench outside, and spent the train ride home scribbling flavor notes on my phone while Mochi judged me via FaceTime from the couch.

It took me three test batches to nail this recipe at home. The first time, my cookies came out completely flat — no cracks at all (turns out I skipped chilling the dough because I’m impatient, lesson learned). The second batch was close but the powdered sugar melted in the oven and they just looked like sad red blobs. But batch number three? Gorgeous. That deep, rich red bursting through snowy white cracks, soft and fudgy in the center, with this subtle cocoa depth and that classic red velvet tang from the buttermilk. Cannoli tried to bat one off the cooling rack, so I knew they were good.
These red velvet crinkle cookies look like they belong in a Parisian pâtisserie window, but they’re honestly one of the simplest cookies I’ve ever made. No piping, no decorating skills, no fancy equipment. The powdered sugar coating does all the beautiful work for you. If you love stunning desserts that are secretly easy, you’ll also want to try my Dubai Chocolate Cake, Easy Pepperoni Pizza Roses, and Deviled Strawberries.
Table of contents
Why You’ll Love These Red Velvet Crinkle Cookies
Let me tell you why these have become one of my most-requested recipes. First — they are absolutely show-stopping without trying. Every single cookie comes out looking different, with its own little pattern of red cracks through the white sugar. They look like you spent hours decorating them. You didn’t. You rolled them in powdered sugar and let the oven do the rest. That’s it.
The flavor is what really surprised me though. I expected them to be just sweet, but there’s this subtle chocolate depth from the cocoa powder, a gentle tang from the buttermilk and vinegar (classic red velvet magic), and a warm caramel note from the brown sugar that makes them way more interesting than they have any right to be. The texture is that perfect soft-and-fudgy situation where they almost melt on your tongue but still have a tiny bit of chew. I’m obsessed.
They also keep beautifully — I’ve made them three days before a party and they were still soft and perfect. And they freeze like a dream, which means you can have gorgeous homemade cookies ready whenever you need them. Future you will be so grateful.
The recipe makes 32 cookies, which is perfect for gifting, cookie swaps, or just having a stash in your kitchen. Mochi and Cannoli approve (from a safe, chocolate-free distance, of course).
Ingredients for Red Velvet Crinkle Cookies
Nothing fancy here — that’s the beauty of these cookies. Mostly pantry staples plus some gel food coloring for that stunning red color.
For the Cookie Dough
- 3 cups all-purpose flour — The cookie’s structure
- 1/3 cup unsweetened natural cocoa powder — That subtle chocolate depth
- 1 teaspoon baking powder — Helps the cookies puff and crack
- 1/2 teaspoon baking soda — Reacts with the buttermilk for tenderness
- 1/4 teaspoon salt — Balances all the sweetness
- 1 1/2 sticks (3/4 cup) unsalted butter, softened — Rich, tender crumb
- 1 cup light brown sugar — Caramel warmth and chewiness
- 1/2 cup granulated sugar — Sweetness and a slight crisp edge
- 1 large whole egg, room temperature — Holds everything together
- 1 large egg yolk, room temperature — Extra fudginess (trust me)
- 2 teaspoons vanilla extract — That warm vanilla hug
- 2 tablespoons buttermilk — The secret to red velvet tang
- 1/2 teaspoon red gel food coloring — Creates that vibrant red
- 1/2 teaspoon white vinegar — Adds tang and helps the texture
For the Sugar Coating
- 1/4 cup granulated sugar — First coat so the powdered sugar grips
- 1/2 cup powdered sugar — The snowy crackle magic
A few notes! Use natural unsweetened cocoa powder, not Dutch-processed. Natural cocoa reacts with the baking soda to create a more tender cookie and makes the red color really pop. If Dutch-processed is all you have, just swap the baking soda for equal baking powder.
Gel food coloring is the way to go here. I learned this the hard way — liquid food coloring requires way more to get the same vibrancy, and the extra liquid messes with the dough texture. Half a teaspoon of gel gives you that deep, gorgeous red.
No buttermilk? No problem. Add 1 teaspoon of white vinegar or lemon juice to regular milk, wait 5 minutes, and you’ve got yourself a substitute. I use this trick all the time when I forgot to buy buttermilk — which is always.
How to Make Red Velvet Crinkle Cookies
This is easier than it looks, I promise. If you can stir things in bowls and turn on an oven, you’ve got this. The hardest part is waiting for the dough to chill (I’ll hold your hand through it).
1. Mix the Dry Ingredients
Whisk together the flour, cocoa powder, baking powder, baking soda, and salt in a medium bowl. Set it aside. This takes about 30 seconds and ensures everything is evenly distributed — no surprise baking soda bites, which I have experienced and do not recommend.
2. Cream the Butter and Sugars
Using a stand mixer with the paddle attachment (or a hand mixer — no fancy tools needed!), beat the softened butter, granulated sugar, and brown sugar on medium speed for about 5 minutes. You want it light, fluffy, and a little bit paler in color. Scrape the bowl a couple times. This step is building all those little air pockets that make the cookies soft and tender.
3. Add the Wet Ingredients
Beat in the whole egg and egg yolk until combined. Now add the vanilla and red gel food coloring — and this is my favorite part. Watching that dough turn deep, gorgeous red is so satisfying. Mix until the color is even, scraping the sides. Then add the buttermilk and white vinegar and mix until just combined.
4. Combine Everything
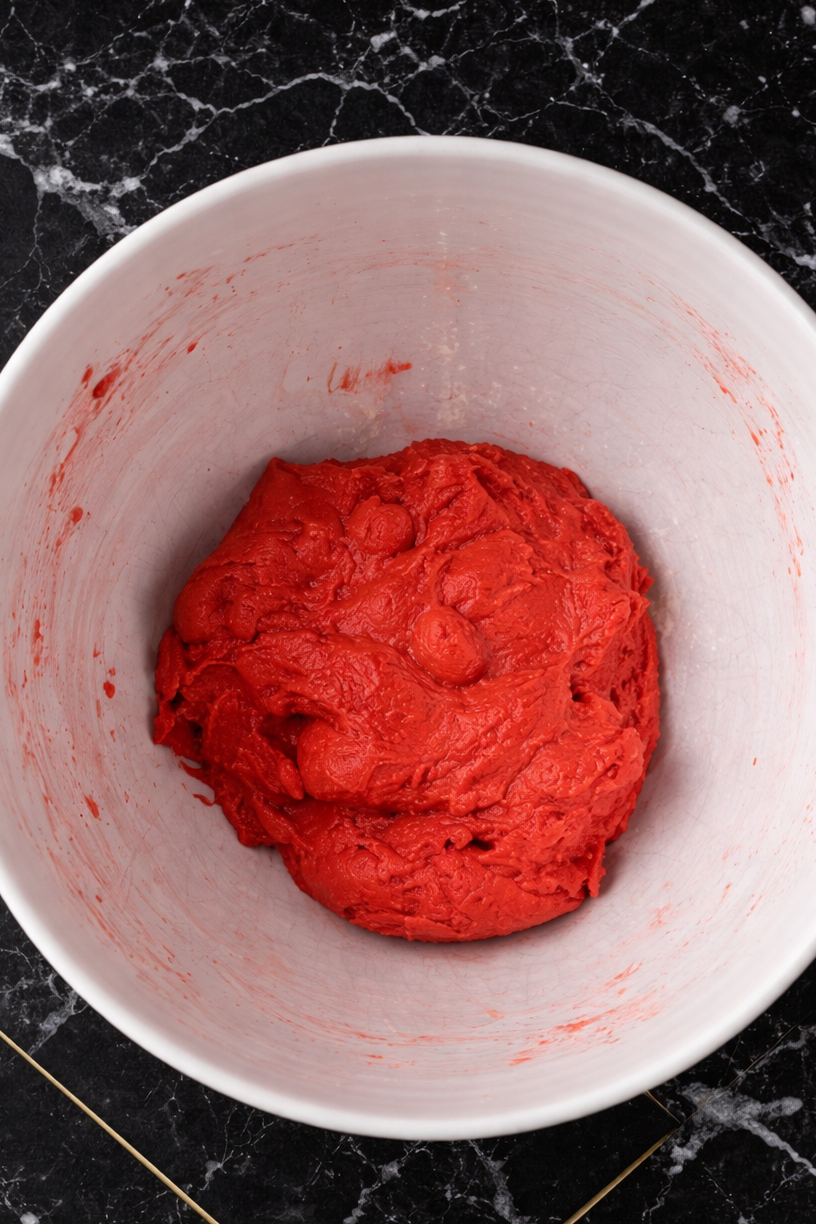
Slowly add the dry ingredients to the wet on low speed. Mix just until the flour disappears — please don’t overmix or the cookies get tough and sad. The dough will be thick and a little sticky. Perfect.
5. Chill the Dough (Please Don’t Skip This)
Cover the bowl with plastic wrap pressed right against the dough surface and refrigerate for at least 1 to 2 hours. I know. I KNOW. Waiting is the worst. But this is what I skipped on my first batch and I got flat, crack-less cookies. The cold dough spreads slowly in the hot oven, and that slow spread is exactly what creates those beautiful cracks. If you chill overnight, let it sit out for no longer than 30 minutes before scooping. It’ll be stiff — that’s what you want.
6. Set Up Your Station
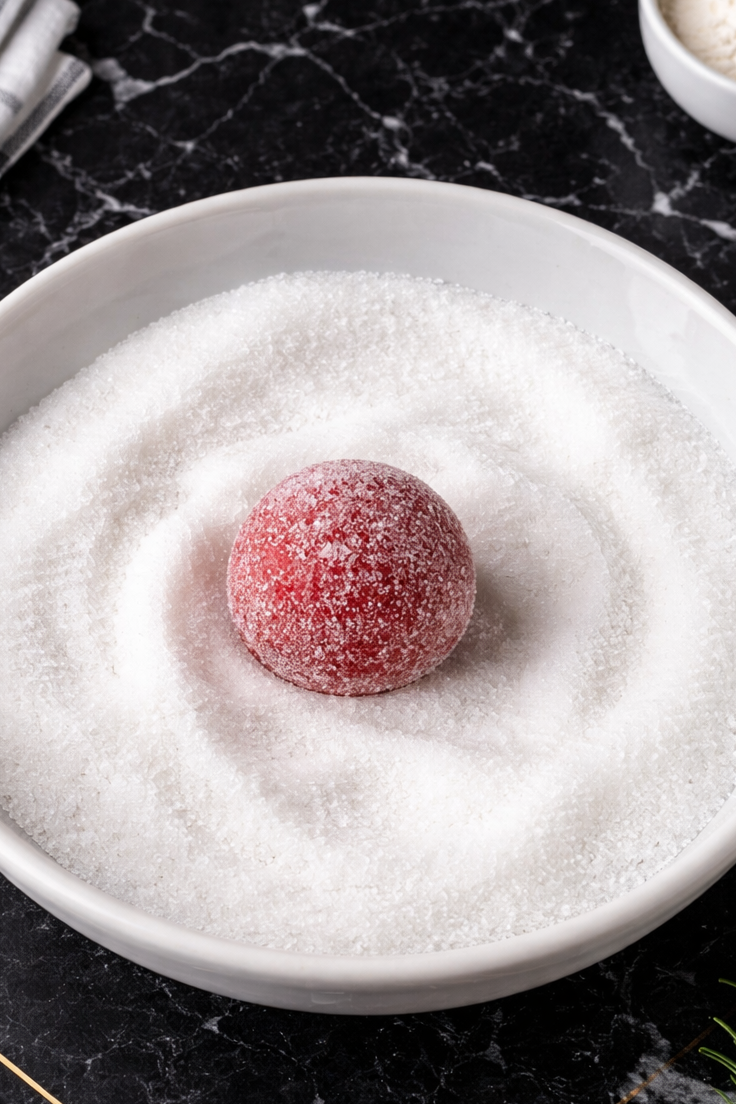
Preheat your oven to 350°F. Line baking sheets with parchment paper. Set up two small bowls — one with granulated sugar, one with powdered sugar. Assembly line style. Mochi usually sits on the counter and supervises this part.
7. Shape and Coat
Scoop the cold dough into 2-tablespoon portions and roll into smooth balls. Then roll each ball first in the granulated sugar (this helps the powdered sugar stick), then into the powdered sugar — twice. Two coats! This is the key to those dramatic white cracks. Stir the powdered sugar between batches if it gets clumpy. Place the balls about 2 1/2 inches apart on your baking sheets.
8. Bake
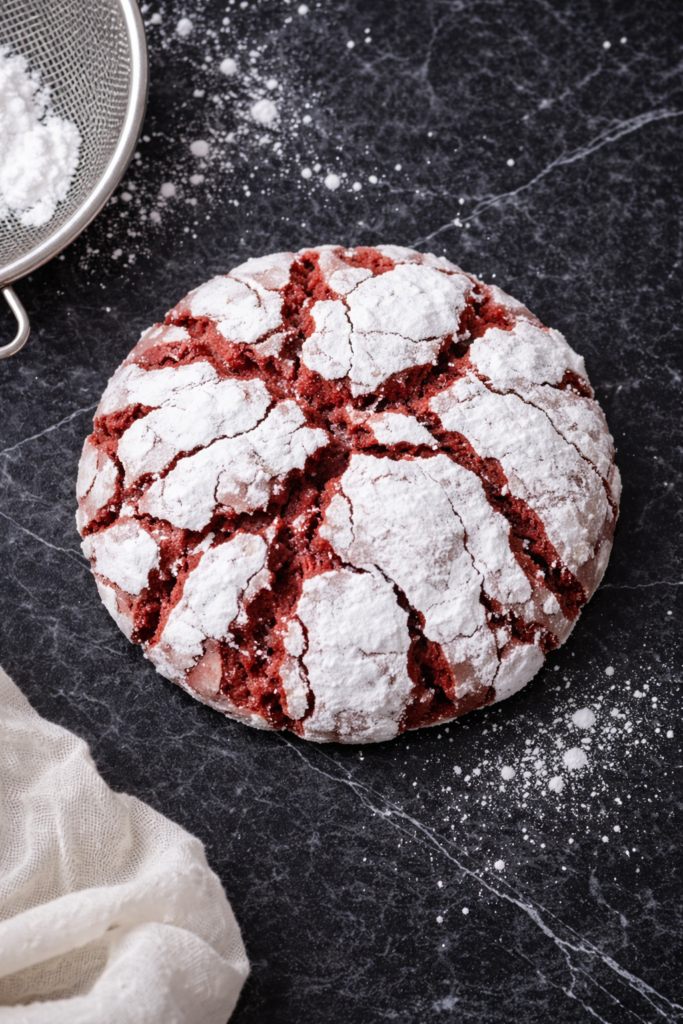
One sheet at a time, 11 to 13 minutes. They’ll look slightly puffed and a little underdone when you pull them out — that’s perfect. Don’t touch them for 5 minutes on the baking sheet (they’re still setting), then transfer to a wire rack. They firm up as they cool and stay beautifully fudgy inside. Makes 32 cookies.
Nina’s Tip: The cookies are done when the tops look set and crackled but the centers still look slightly soft. If you wait until they look “done done,” they’ll be overbaked by the time they cool. Pull them out a minute early rather than a minute late — you can always put them back in, but you can’t un-bake them!
Storage and Serving
These red velvet crinkle cookies keep for up to 5 days in an airtight container at room temperature. They stay soft and fudgy the whole time, which honestly still amazes me.
To freeze, cool completely, freeze in a single layer on a baking sheet, then transfer to freezer bags with parchment between layers. Good for up to 2 months. You can also freeze the unbaked dough balls — coat them in sugar straight from frozen and add 2 to 3 extra minutes to the bake time. Future-you cookie emergency kit.
These are beautiful on a holiday cookie platter, stacked in clear bags with ribbon for gifts, or just piled on a plate next to a mug of hot chocolate. I brought a box to my friend’s holiday party last year and people literally gasped. One woman asked if I was a professional baker. I said “absolutely not” and it made her day because it meant she could make them too.
Variations for Red Velvet Crinkle Cookies
The fun part — making them your own! Here are variations I’ve tested:
- Espresso red velvet: Add 1/2 teaspoon espresso powder to the dry ingredients. Deepens the chocolate without tasting like coffee. My personal favorite variation.
- White chocolate chip: Fold in 3/4 cup white chocolate chips before chilling. The sweetness against the cocoa tang is incredible.
- Cream cheese stuffed: Freeze tiny balls of sweetened cream cheese, then wrap dough around them before rolling. That melty center is a showstopper.
- Classic chocolate: Skip the food coloring. You get gorgeous dark chocolate crinkle cookies instead — still stunning.
- Peppermint red velvet: Add 1/4 teaspoon peppermint extract. The red-and-white with mint flavor is so perfect for Christmas.
- Spiced version: 1/2 teaspoon cinnamon and a tiny pinch of cayenne in the dry ingredients. Warm with a little surprise kick.
- Vegan option: Vegan butter, flax eggs (1 tablespoon ground flaxseed plus 3 tablespoons water per egg), and plant-based milk with vinegar instead of buttermilk.
Nina’s Tip: If you’re making these for gifting, the cream cheese stuffed version is the one that gets the biggest reaction. It’s a little extra work but people absolutely lose their minds over that melty center. Just make sure the cream cheese balls are frozen solid before wrapping.
Tips for Perfect Red Velvet Crinkle Cookies
- Keep the dough cold: If it warms up while you’re scooping, pop it back in the fridge for 10 to 15 minutes. Warm dough = flat cookies = no cracks = tears.
- Double coat the powdered sugar: This is non-negotiable. One coat melts in the oven and you lose all that beautiful contrast. Two coats gives you those dramatic snowy cracks.
- Room temperature eggs: Cold eggs seize up the butter and make lumpy dough. Set them out 30 minutes before you start.
- One sheet at a time: Even heat circulation means consistent cookies. I know it’s slower but it’s worth it.
- Pull them early: They should look slightly underdone when you take them out. They keep cooking on the hot sheet for those 5 resting minutes.
- Stir the powdered sugar: It clumps up from dough moisture between batches. Clumpy sugar means uneven cracks.
- Smooth balls matter: Take an extra few seconds rolling each one smooth. Smoother balls crack more evenly and dramatically.
FAQ About Red Velvet Crinkle Cookies
Granulated sugar is essential for the proper consistency and setting of this lemon posset. Liquid sweeteners like maple syrup, agave, or vegan honey add too much moisture, which prevents the mixture from firming up properly during chilling. The sugar dissolves into the coconut cream and helps create the thick, custard-like texture that makes posset special.
Silken tofu has a completely smooth, creamy texture unlike regular tofu, which is denser and crumblier. For this recipe, you need firm silken tofu specifically. Shelf-stable firm silken tofu (found in boxes on shelves) gives the best, thickest results. Refrigerated firm silken tofu works but creates a slightly thinner final texture. Regular firm tofu won’t blend smoothly and will ruin the dessert.
Yes! This dessert is perfect for making ahead. In fact, it must chill overnight (at least 8 hours) to set properly, making it ideal for party planning. Prepare it 1-2 days before your event and keep refrigerated. If serving in lemon halves, make it no more than 2 days ahead as the shells can deteriorate. In ramekins, it keeps for 2-3 days.
Full-fat canned coconut milk can work if you refrigerate the can overnight and scoop out only the thick cream that rises to the top (discard the watery liquid). You need the full fat content for proper texture. Avoid coconut milk from cartons, which is too thin. Some people have success with cashew cream (soaked cashews blended with water), but coconut cream gives the most authentic results.
After chilling overnight (at least 8 hours), the posset should have a thick, custard-like consistency that jiggles slightly when you shake the container but holds its shape. It should look silky and smooth on top. If it’s still runny after 12 hours, it may not set further – this usually means too much liquid was added or the mixture wasn’t blended thoroughly.
Absolutely! Small ramekins, wine glasses, tea cups, or mason jars all work beautifully. Lemon halves make a stunning presentation but are optional. Using ramekins or glasses actually extends the storage life to 2-3 days versus lemon shells which deteriorate faster. You can also make one large posset in a serving bowl and scoop portions when serving.
Recipes You May Like
- Dubai Chocolate Cake – Rich, decadent, and perfect for chocolate lovers
- Pizza Cupcakes – Fun savory bites that are great for parties
- Deviled Strawberries – Elegant finger food dessert for gatherings
Conclusion
I really hope you give these red velvet crinkle cookies a try. They’re one of those recipes that looks like you spent all day in a professional kitchen but actually comes together so simply. That combination of fudgy chocolate centers, tangy buttermilk flavor, and those stunning snowy cracks — it’s dessert magic. Every time I make them, I remember standing outside that Vienna bakery window in the cold, and it makes me smile.
Whether you’re baking these for a holiday cookie swap, wrapping them up as gifts, or making them on a quiet Sunday afternoon with your cat supervising from the counter (just me?), I think you’re going to love them.
If you make these, please tag me — I genuinely light up every time I see your bakes in my DMs. And if they don’t come out perfect? Eat them anyway. Imperfect cookies are still cookies, and cookies are always a win.
Happy baking, friends ♡

Red Velvet Crinkle Cookies
- Total Time: 3 hours 9 minutes
- Yield: 32 cookies 1x
- Diet: Vegetarian
Description
These stunning red velvet crinkle cookies are showstoppers with their rich crimson color peeking through gorgeous snowy white cracks! Perfect for Christmas, Valentine’s Day, or any special occasion where you want to make an impression.
Ingredients
- 3 cups all-purpose flour
- 1/3 cup unsweetened natural cocoa powder
- 1 teaspoon baking powder
- 1/2 teaspoon baking soda
- 1/4 teaspoon salt
- 1 1/2 sticks unsalted butter (3/4 cup, softened)
- 1 cup light brown sugar
- 1/2 cup granulated sugar
- 1 large whole egg room temperature
- 1 large egg yolk room temperature
- 2 teaspoons vanilla extract
- 2 tablespoons buttermilk
- 1/2 teaspoon red gel food coloring
- 1/2 teaspoon white vinegar
- 1/4 cup granulated sugar (for coating)
- 1/2 cup powdered sugar (for coating)
Instructions
- Start by whisking together your dry ingredients: flour, cocoa powder, baking powder, baking soda, and salt in a medium bowl. Set this aside for now.
- In your stand mixer fitted with the paddle attachment (or using a hand mixer), beat the softened butter with both sugars on medium speed for about 5 minutes. You want everything well creamed and fluffy – make sure to scrape down the bowl partway through.
- Beat in the whole egg and egg yolk until incorporated. Add the vanilla and red gel food coloring, mixing until the color is evenly distributed throughout. Scrape the sides again to catch any unmixed bits. Pour in the buttermilk and vinegar and mix until combined.
- With your mixer on low speed, gradually add your dry ingredients to the wet mixture, mixing just until everything comes together into a cohesive dough.
- Cover your bowl of dough tightly with plastic wrap and refrigerate for at least 1-2 hours. If you’re chilling it longer or overnight, let it sit at room temperature for no more than 30 minutes before scooping – the dough needs to stay cold to get those beautiful cracks, even though it’ll be quite stiff.
- When you’re ready to bake, preheat your oven to 350°F and line baking sheets with parchment paper. Set up your coating station with one bowl of granulated sugar and another of powdered sugar.
- Scoop the firm, chilled dough into 2-tablespoon portions and roll each into a ball. Once all your balls are formed, roll each one first in granulated sugar, then give it two separate coats of powdered sugar – you really want that white coating thick! If the powdered sugar gets compacted, give it a stir. Space the coated balls 2½ inches apart on your prepared sheets.
- Bake one sheet at a time for 11-13 minutes. The cookies should still look soft in the center. Let them cool on the baking sheet for 5 minutes before transferring to a cooling rack. This makes 32 gorgeous cookies!
Notes
The secret to those dramatic white cracks is all in the technique! Double-dipping in powdered sugar is crucial – otherwise it might melt away in the oven before creating those beautiful fissures.
Chilling the dough is absolutely non-negotiable! Cold dough spreads slowly in the oven, which is what creates that signature crackle effect.
If your dough starts warming up while you’re working, just pop it back in the fridge to firm up again.
Work quickly to keep everything cold.
These beauties will stay fresh in an airtight container for up to 5 days.
Their vibrant red color makes them especially beautiful for Christmas cookie platters or Valentine’s Day treats!
- Prep Time: 25 minutes
- Cook Time: 44 minutes
- Category: Dessert
- Method: Baking
- Cuisine: American
Nutrition
- Serving Size: 1 cookie
- Calories: 139
- Sugar: 13g
- Sodium: 55mg
- Fat: 5g
- Saturated Fat: 3g
- Unsaturated Fat: 1g
- Trans Fat: 0g
- Carbohydrates: 23g
- Fiber: 1g
- Protein: 2g
- Cholesterol: 23mg